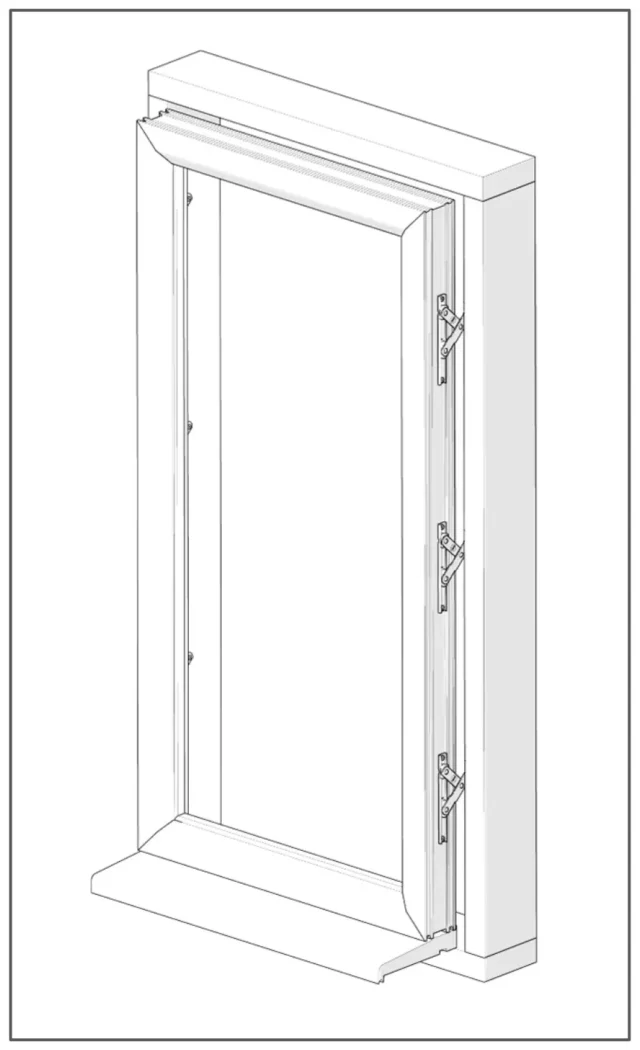
1. Fit the window brackets to the outer-frame internal or external rib position – depending on the throw required, with the fixed pivot to the top with Yale logo the correct way up
2. Brackets are to be located 150mm from the top and bottom of the outer frame and any transom leaving no greater distance than 600mm between each bracket.
3.Where the bracket fitting position aligns with the outer frame steel reinforcement, secure using 4.8 diameter pan head drill point screws. ( of a minimum 19mm length as tested).
4.Place the window into the timber frame, setting the position from the bottom of the aperture Ensure that the differential movement is allowed for.

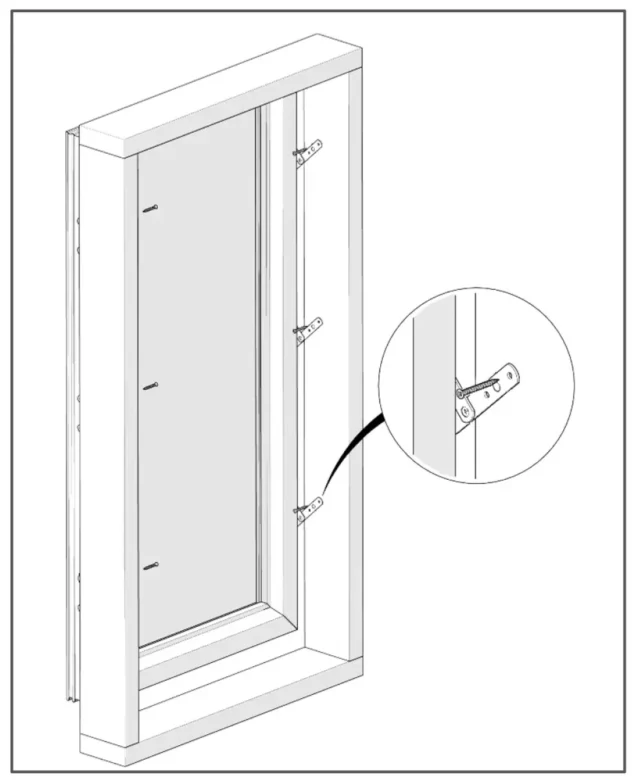
5.Ensure to set leaving approx 10mm from each side of the timber frame aperture to the window.
6.Secure straps to timber frame using 4.8 x 38mm countersunk timber fixing screws through each of the straps fixing brackets.
7.Adjust window to ensure correct level, then fix a second screw into each strap to secure.
8.If the window is greater than 1300mm wide an L-shaped bracket is to be fitted to the middle underside of the cill to prevent window flex.
9.Differential movement windows to be allowed underneath frame:
• Ground floor 8mm
• 1st floor 16mm
• 2nd floor 24mm
• 3rd floor 32mm
NOTE: Where windows are greater than 1200mm in height, additional window brackets will need to be fitted with no greater distance than 600mm between each bracket.
Fixing Summary
• Bracket to window aligned with steel reinforcement 4.8 pan head drill point. } Minimum 19mm
• Bracket to window not aligned with steel reinforcement 4.8 pan head drill point. } in length.